
If you've done a bit of cake decorating it's not much of a stretch to make one of these, and even if you haven't it's entirely possible, with careful planning and lots of patience! It definitely is time-consuming, though - newbie mistake #1: only allowing a couple of hours. The first time I made one I backed myself into a corner as far as time was concerned, and the results were fairly underwhelming. I would recommend allowing 3-4 hours to bake the cakes (the day before you need them - most of this time is just baking time but you still need to be there), then an hour for shaping and the first layer of icing, an hour for them to firm up, an hour for the fondant and assembly, and then another hour or more for decorating, depending how complex your decorations are and how proficient you are. If you're an experienced caker you might be speedier at some steps - if you have no experience they might take longer. If you stop to take photos every 30 seconds you'll definitely need longer - trust me! ;-)

Preparation is the other key - make sure you have all the ingredients (and preferably some spare, just in case!).
For a two tier cake like mine you will need:
- Ingredients to make 6 cakes (I used this recipe x 2)
- Ingredients to make a large batch of buttercream or ganache (I used this recipe x 2)
- 2kg of fondant/white icing
- Gel colours for tinting the icing
- A strong 30cm cake board
- A small cardboard cake board, cut to the size of your smallest cake
- Kebab sticks, dowels or straws to support the cake
- Ribbon to trim the cake board
- Anything else you need for decoration
You can make the topsy turvy cake either two or three tiers - even a two tier cake is pretty big due to its height, but three tiers will look extra impressive. Using my mud cake recipe and 'event' portions (you don't need a lot of mud cake anyway as it's so rich!) a two tier cake makes around 50 portions; three tiers would be at least 100, as the bottom tier is lots bigger.
Each tier consists of three cakes. Two of these will be slightly larger than the third; as each tier is tapered this will mean a bit less waste. If you don't have all the tin sizes you want you can make a bigger one and trim it down (the off-cuts still taste delicious!). I made one 10cm cake, three 15cm cakes and two 19.5cm cakes. For a three-tier cake you'd want two 24-25cm cakes and an extra 19.5cm one.


Because so much cake is required you'll probably have to do these in stages - I only have one of each size tin so making three of one size requires three times the cooking time, plus a few minutes in between each for cooling.
I use mud cake, and made two batches of the recipe I wrote up yesterday to make my cakes. I should have measured the capacity of my cake tins and divided the mixture a little more carefully, but it's close enough that I don't mind - and because the cakes are skewed it's pretty hard for someone to tell if they're not the same height anyway.
Shaping the cakes
The reason I like to use mud cake is that being so dense it is very easy to cut to shape. It becomes quite solid when cooled (don't try to do anything with it when it's hot, though!) so it's not too fragile. You can use a regular cake - make sure your icing is nice and firm to give it a bit more strength, though, and just take a little more care when moving it around.

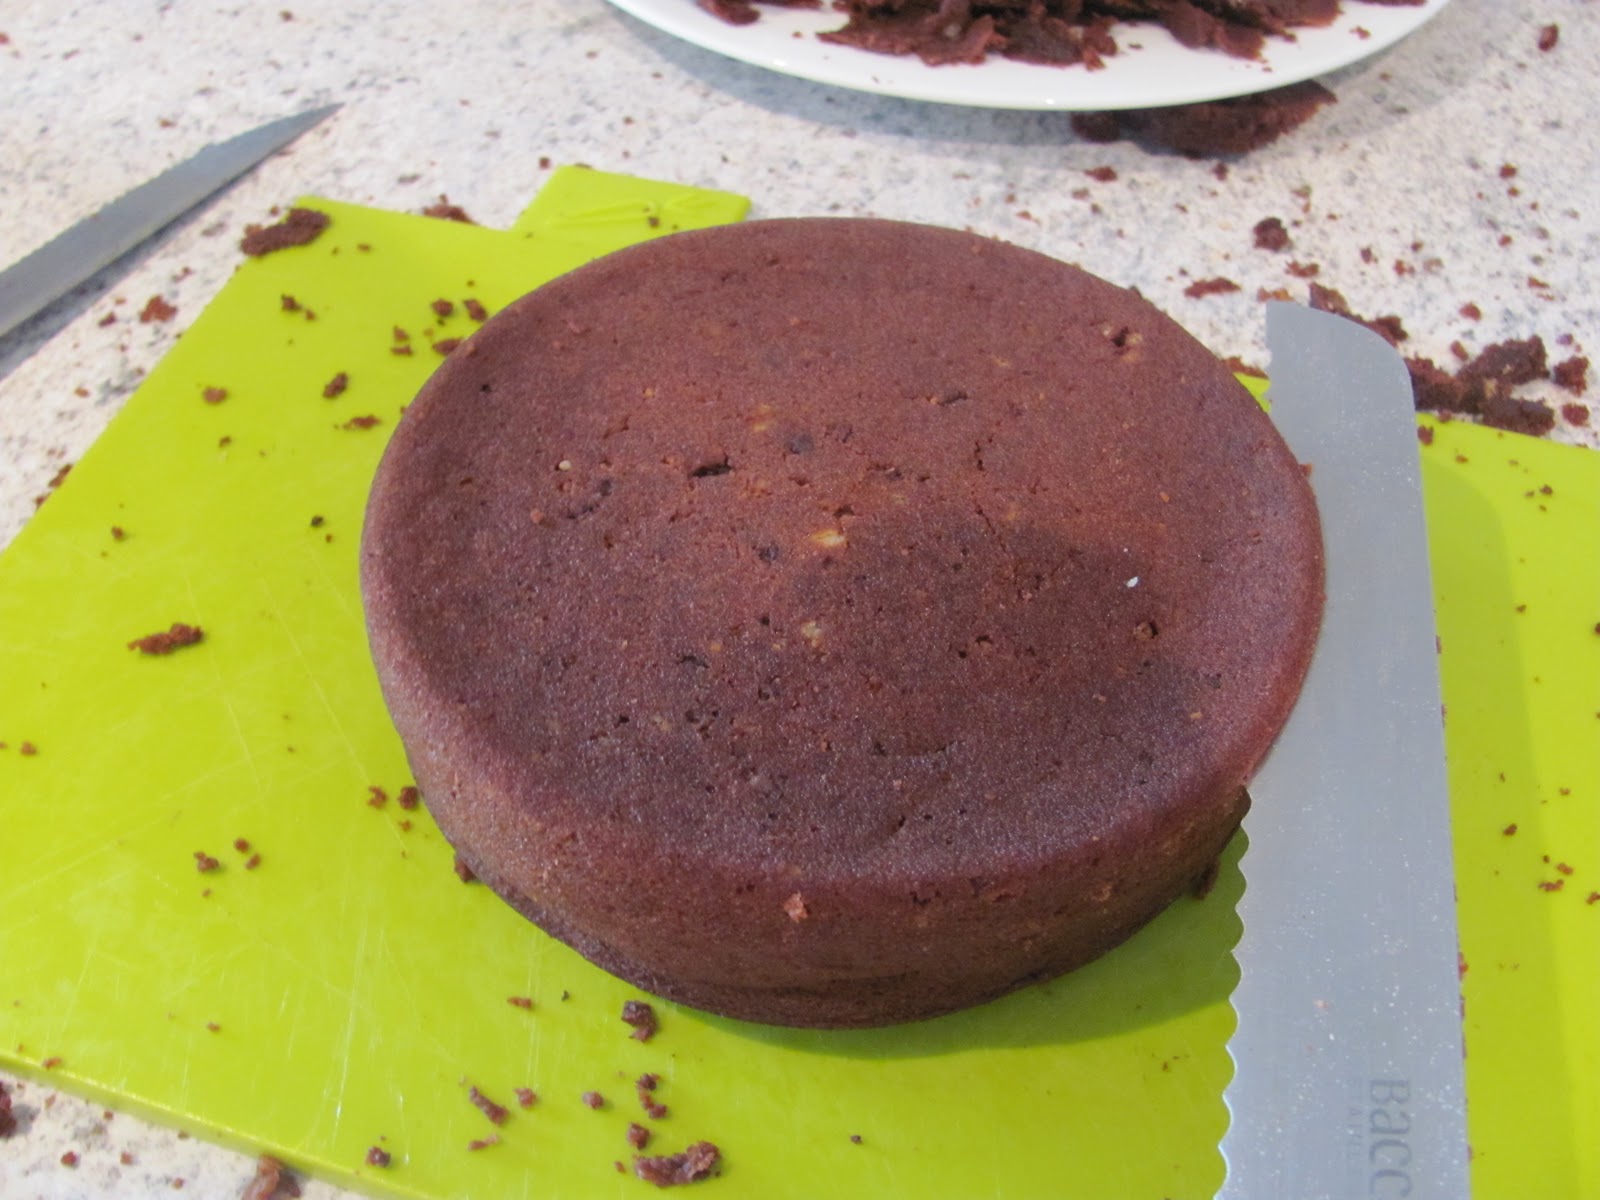


The first step in making the cake look topsy turvy is to make the top slant. For each tier, take the top cake (this will be one of the larger ones for that tier, and I always look at the cakes and choose the nicer looking one for the top) and use a bread knife to cut from the top edge of one side to the bottom edge of the other. This will give you two wedge-shaped pieces. By rotating one of these so that the thick edge of both pieces is on the same side you get a nice slanty top.


Next we need to trim the sides so that they are smooth. Stack the bottom two cakes (the non-slanty ones) for the tier you are working on together, with the smallest cake on the top, and use a serrated knife to trim the edges so that they taper outwards, and are smooth all the way around. It's easier to do this before flipping the stack over and adding the third cake.


Flip those two layers over and set your slanted pieces on top. Trim the edges of these so that the whole stack tapers evenly and is reasonably smooth. It doesn't have to be perfect as icing will help create an even finish. Repeat these steps for each tier (although if you make a three-tier cake you may find it works better not to taper the bottom tier so much).

Once the tiers are shaped you're ready to ice. Each layer needs icing in between, and each tier needs to be covered in icing. For chocolate cake, ganache is good; otherwise use an appropriately flavoured buttercream. Cream cheese icing is too soft to provide the structure needed for this cake, layers would be prone to moving a little, which you definitely don't want!


I swear, everything I make fails in some way or another. ;-) With this it was the bottom cake of the top tier - when I had the cakes all iced together it sloooooowly cracked and the whole thing fell over. Turns out I overcooked this cake a little and it pretty much crumbled under pressure. Fortunately it was probably the most expendable bit, and my cake was perfectly fine when I removed it. Thank goodness - I would not have been a happy camper if I had needed to bake another!

When all the cakes for each tier are together do a quick check for shape - carve off any unruly sticky-outty bits - then cover the whole thing in icing. Then you'll need to allow some time for them to firm up - preferably an hour or so, and if you can fit them in the fridge or even the freezer, all the better. The firmer the icing the easier it will be for you to get a perfectly smooth finish with your fondant.


In the meantime (if you need to), tint the fondant. I prefer to be generous with the amount - you can keep leftovers tightly wrapped in gladwrap then stored in an airtight container, but if you don't make enough you'll have a stressful time trying to match it. It's also better to build up the colour gradually if you're uncertain, as it's much easier to add more colour than take it out! Dab the gel colour onto the fondant and then just knead until it's all worked through.

Covering your cake board with fondant gives a more professional finish - but if you prefer just use a paper-coated board. You do need a full weight board - a cardboard cake disc won't support the weight of this cake. If you choose to cover with fondant, just roll it out to the size of your board, lift it up using your rolling pin, and drape over the board. Trim around the edges (best to cover the edge with icing and then trim with ribbon over the icing) and you're done.


Roll out the fondant to cover the cake - keep in mind that these are much taller than normal cakes so you need to roll a pretty huge circle of fondant. It also pays to be generous with the thickness - thicker fondant is more malleable, where a thinner layer will break and fold. Once you've rolled it to size, drape it over your rolling pin and carefully place over the cake.


This cake is tricker than usual to coat due to the tapering - for this reason stripes or some other kind of decoration with lots of coverage are great, as you can cover many sins. ;-)


Use the cake board for the top tier (excuse my very hacked up solution, made from 9 layers of thin cardboard as I have run out of cake discs and had nothing thicker) to trace a circle in the top of the bottom layer with a knife. Remove the disc and cut into the cake in a circle - the idea is to make a shelf for the top cake to sit on, so you'll need to cut deep at the back but shallower as you work your way around to the front. Then make a horizontal cut from the front - you should be able to lift out the whole wedge. Some decorators fill this area with fondant but I find it's tricksy enough trying to get the perfect sized hole without trying to mentally calculate the extra space for a layer of fondant!
Ice the top tier with fondant, exactly as you did for the bottom tier, then check it fits in the shelf as you may need to trim a little more off. When the shelf is the right size, take the top tier off again - now it's time to add the supports. As with wedding cakes, you want to take the weight of the top tier off the bottom tier, which is done by inserting a series of rods through the bottom layer; the board under the top cake then rests mainly on these, rather than the cake below.


Now you can pop the top tier on and you're ready to decorate. I'll omit the decorating lesson tonight as this post is quite long enough already, but my decoration was pretty simple - multicoloured spots, and a cartoony garden theme with a couple of roses on top.


Well, let's just say the nickname "Mrs Cake" didn't come about for no reason. ;-)


 Hi! I'm Rosa, a.k.a. Mrs Cake, and I live in Wellington, New Zealand. I love food in all its forms, my fabulous family, and a bit of good old-fashioned Kiwi DIY. This blog started around food but has evolved to include some other bits and pieces - I hope you'll join me for the journey!
i love it i love it i love it!!
ReplyDeleteoh that worked well!!!!
ReplyDeleteLove the end pic.
Well done you .. now i have my two girls birthdays coming up...
x
OMG, that is epic. Well done!
ReplyDeleteWow,I'm impressed !!
ReplyDeleteThanks guys! bubbleyness I bet you'd make one even prettier than mine, and your girls would love it!
ReplyDeleteOh wow that's amazing Rosa, you've excelled yourself!!! Do you reckon its possible to freeze the cake once it's been ganached and fondanted? I'm thinking of making my own wedding cake with no previous fondant experience...pending disaster you think? :)
ReplyDeleteNessie, I've never tried - but have read that many people do this. You need to defrost it at room temperature to prevent sweating - and it probably goes without saying but you should do some kind of practice run with fondant first too! ;-) I'm sure you'll be fine, though! :-)
ReplyDeleteAmazing.
ReplyDeleteMy delight of the day was making marzipan and am now trying to stop myself from eating it all out of the freezer.
I am going to attempt macarons and am trying to get Ginbird to do the same.
Emma: Yum! It's always the challenge, stopping yourself from eating the whole lot once you've made it. ;-)
ReplyDeleteThat looks fantastic! I would think the recipient loved it.
ReplyDeleteThanks Megan. :-) It definitely vanished pretty quickly!
ReplyDeleteWOW you have written up the best list instructions with great pics and you made so much sense compared to some sites ive read. Im doing my own research to make one for my 30th birthday in July which I was a little hestiate at first (didnt think my skills would go that far) but i think if I study your page I might just manage something presentable! Thanks...I think i have a new blog to love Naterlee
ReplyDeleteThanks Naterlee! I'm glad you found this helpful - good luck with your cake! Allow yourself lots of time and keep it as simple as you can and I'm sure you'll be fine. :-)
ReplyDeletedo you think it can be iced & decorated with just buttercream? i will be making a topsy-turvy cake next weekend for a 1st birthday, but previous cakes ive made with fondant didnt really go down well with the children lol
ReplyDeleteKerrin, I'm sure it's possible but fondant does add a structural element so it's probably easier with. If you're here in New Zealand I recommend Bakels Pettinice - I find it tastes nicer than the others I've tried.
ReplyDeleteThese are the best instructions ive come across, ive spent so much time trying to find a site that could explain this well. Thank you so much. I now have a great idea for my grandads birthday cake this month :) youre cake looks amazing, hope i can get it right. Thank you, Zhivon :)
ReplyDeleteAw, thank you! So glad I can help, hope your cake turns out well. :-)
ReplyDeleteI have been asked to make a 3 tier topsy turvy wedding cake for my daughter's best friend. However, she wants it to be a traditional rich fruit cake, marzipaned and regal iced (yes, from UK). What do you think my chances are? I have made several big wedding cakes - last one being for my daughter, hence the request to make this one. Scary!
ReplyDeleteAnon, I'm sure you'll be fine! Apart from being expensive to make, fruit cake is ideal, since you can make it much further ahead without last minute stress, and it's very firm. Just give yourself plenty of time and it'll be grand. :-)
ReplyDeleteI'm looking at this cake and thinking would be great to attempt for my wedding as the wedding is a couple of months away I have heaps of time. We would make it using fruit cake and I was wondering what you would suggest we use between each layer of cake, you used ganache for a chocolate cake, would I use buttercream? and what flavour? Thanks, all the pictures and instructions are amazing!
ReplyDeleteThis would be a great wedding cake! Certainly serves lots of people. :-) I would probably go for a lightly flavoured buttercream for fruit cake, perhaps vanilla or brandy depending on your preferences. Though I personally believe chocolate goes with everything and would happily eat ganache with my fruit cake too. ;-) Good luck!
ReplyDeleteHi, this is Pam (anon from 6 Jan posting!) just reading that you recommend buttercream to layer up the fruit cake. i was thinking of using jam/marizpan/jam in mine as I wasn't too sure about buttercream lasting very long outside of a fridge. If using some kind of cream, I'm with you in that chocolate would go much better with the fruit!
ReplyDeletePam, that makes sense too - in my experience both buttercream and ganache last reasonably well at room temperature for at least 2-3 days, so long as 'room temperature' is not too tropical (i.e. below 20 degrees C). For any longer than that you're right, you'd probably either want to be able to chill the cake (giant fridge) or use something more stable. :-)
ReplyDelete